
It's time for part 3! In this entry we're going to tackle the pleats and stay stitching.
Pleats
They may seem scary and confusing, but they're really not. It's just a matter or bringing the lines you've marked together and stitching them. We'll start with the center pleat first.
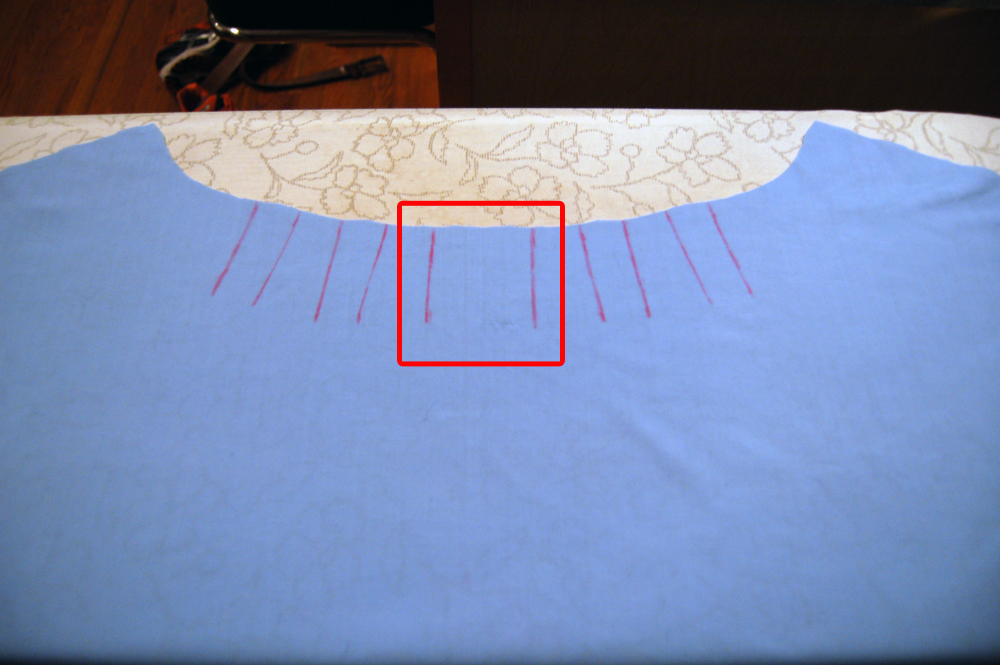
Locate the 2 lines you made in the very center of piece number 1.
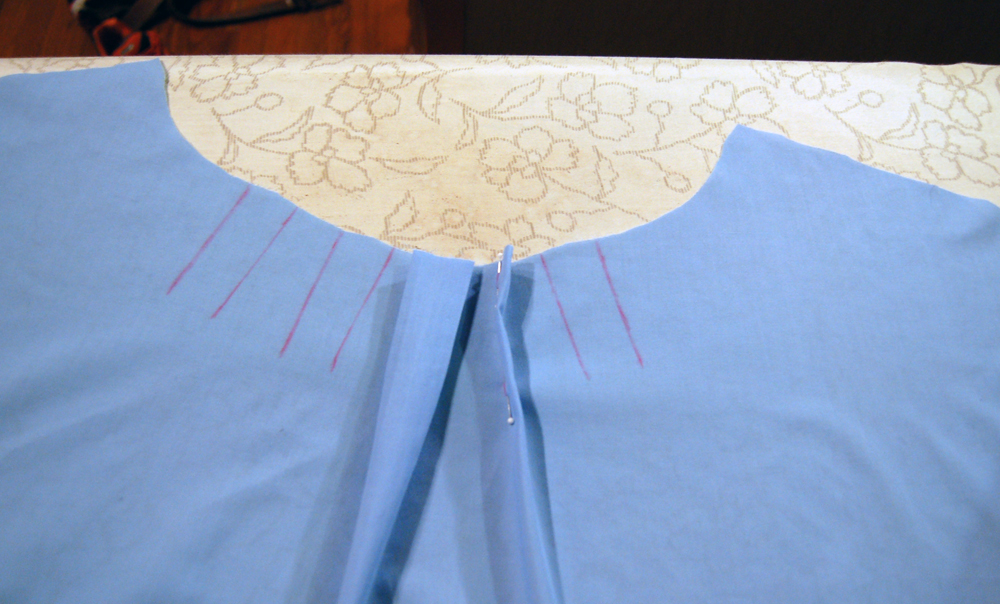
To bring the 2 lines together, you want to sort of fold the fabric in half. Match up the two lines, and pin them together, like this:

Here's what it looks like when you unfold your fabric with the pins still in, just for a visual reference:

Stitch right on the line, remembering to backstitch at the beginning and end:

I decided to use contrasting thread for my top in order to make it more visible. I didn't realize it so closely matched the pink chalk lines, so I hope you can see it. A quick word about backstitching; don't go crazy with it. One or two stitches at each end is sufficient.
Unfold your fabric, and you'll have this:

As it says in the instructions, press this pleat flat, bringing the stitching to the center:

You've done it! You've just made your first pleat! Take a look at the right side of the fabric, and it should look like this:

The rest of the pleats will be made in pretty much the same manner, only you'll press them away from the center pleat. Pin your next pleat the same way you did the first one, bringing the lines together:
Stitch on the line, backstitching at both ends, and then press this pleat away from the center pleat:

You've made 2 whole pleats! You're on a roll. Flip the fabric to the right side, and give it another good press.

Finish sewing the rest of your pleats. When you're done, it should look something like this on the wrong side of the fabric:

And like this on the right side:

Remember to press as you go. As you tackle more projects, you'll make better and better friends with your iron. I like to think of my iron as the sidekick to my sewing machine.
Next, our instructions tell us to baste along the upper edge of the pleats. This is just to hold them in place in the correct direction Confession; I don't always do this. I didn't on the first top that I made. If you have pressed your pleats really well and are careful when you sew the neckline, you may not need the basting. I did it this time to show an example. Set the stitch length on your machine to the longest one, and stitch across the pleats, close to the raw edge of your fabric. I lined my presser foot up with the raw edge.

We are officially DONE with the pleats! Truthfully, this is probably the most difficult part of the whole project. That wasn't so bad, was it?
Stay Stitching
What is this step, and why do we need it? Stay stitching prevents curved areas (the neckline, on this garment) from stretching out of shape before we sew the neck facing on. If you look at the diagram in your instructions, you'll notice two curved arrows that point to the center of the neckline.

This is to indicate which direction to sew in. Starting from the shoulder, stitch to the center of piece number 1, and stop.

I like to stitch 1/2" from the raw edge. Seam allowances (which we'll get into more in the next steps) on patterns from most companies are 5/8", unless otherwise stated in the directions. Placing the stay stitching 1/2" from the raw edge will ensure that it won't be visible from the outside when the garment is finished.
Do the same thing starting at the opposite shoulder, and stopping in the center.

Once you've finished the stay stitching on piece 1(the front of your top), do the same thing for piece number 2 (the back of your top).

And that's that! In the next post, we're going to be working on the side and shoulder seams. Thanks for sticking with me!
this is going to be so helpful, as i did my pleats really differently... no wonder it didn't look right. i am going to try to re-tackle my blouse tomorrow, thank you a million times over for this tutorial! i can't wait to share my blouse with you if i am successful!
ReplyDeleteI'm so glad you found this helpful! It's so hard to know if I'm coming across clearly. There are different types of pleats, so the ones you made might have been correct, just not for this project :)
ReplyDeleteI spent part of this afternoon ripping out everything I did last weekend! I like to see everything at once, so once the next steps are posted I'll start tackling the blouse. It's really nice how you've sectioned it off and worked in the pictures. Pictures are what I need!! I've a visual learner :) Can't wait to see the next step because piecing it together was the hardest part. front/back didn't match up!
ReplyDeleteHeh, I was worried that I included too many photos. Glad to hear they'll be of help to you! I hope to have the next post up tomorrow. I underestimated the amount of time it would take to do each step and then stop to take photos.
ReplyDelete